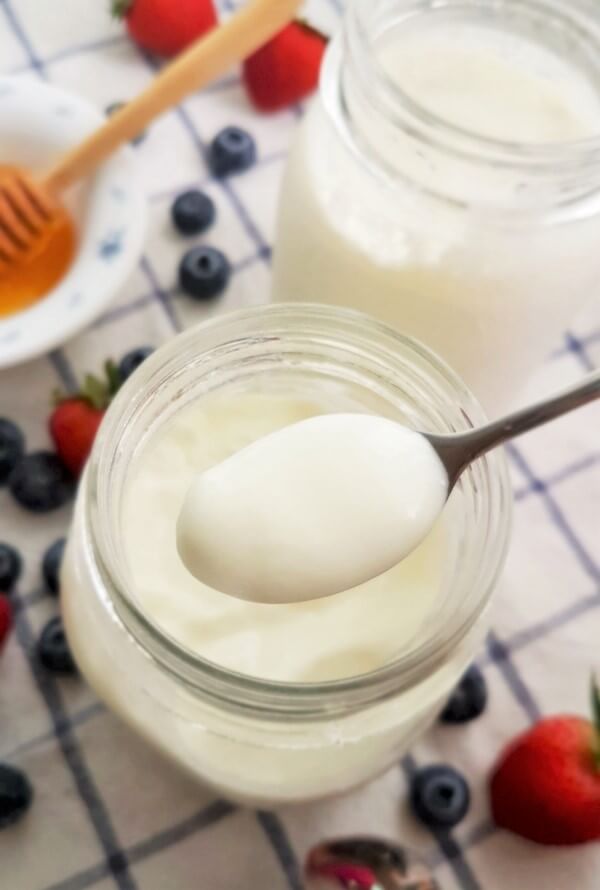
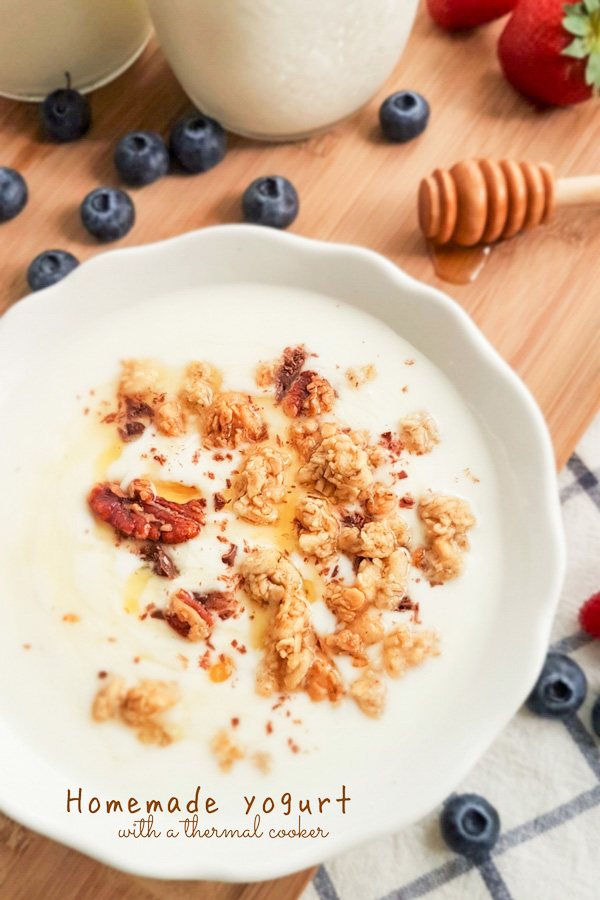
Yogurt is one of my favorite healthy snacks. Did you know that it is so easy to make your own yogurt? It is also more cost-efficient and you’d be using less plastic compared to store-bought yogurt. In this post, I will show you how to make yogurt at home with a thermal cooker.
Recently, I bought a thermal cooker and it introduced a whole new way of cooking for me. If you’ve never heard of a thermal cooker before, read my article here. I experimented with making yogurt using a thermal cooker and I was really pleased that it was so simple and the yogurt turned out delicious and nicely tart.
There are 2 ways you can make yogurt with a thermal cooker. Depending on the size of the thermal cooker model, you can make up to approximately 7 qts of yogurt if you heat the milk directly in the cooker’s inner pot. For small amount of yogurt, use jars. The number of jars you can fit inside your thermal cooker will also depend on the size and height of the thermal cooker and the jars.
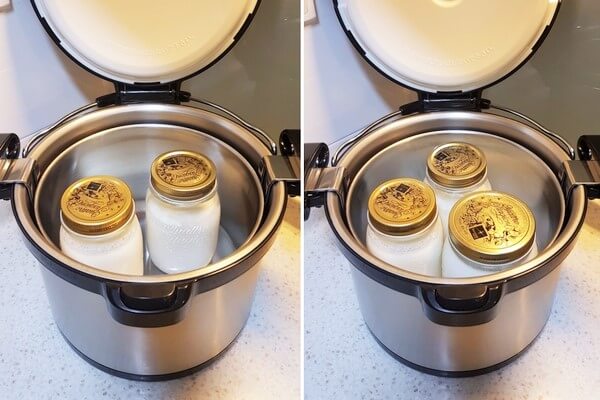
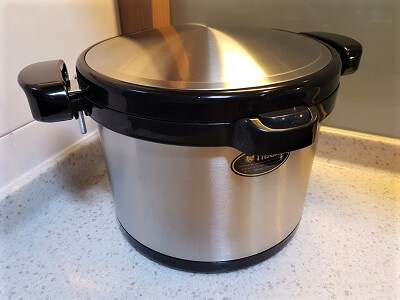
The thermal cooker that I’m using for this easy homemade yogurt recipe is by Tiger and its capacity is 5.2 litres. You can easily fit two to three 500ml jars inside. Use smaller jars if you wish to make many small jars of yogurt. Just stack them up.
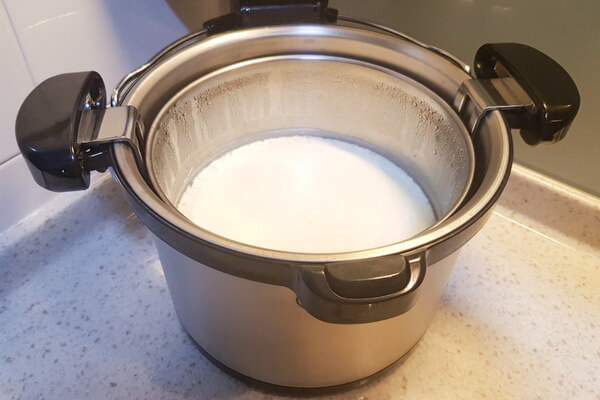
To make a bigger batch of yogurt (2 L to around 4.5 L), heat up milk directly in the thermal cooker’s inner pot and place in the outer container to incubate.
Ingredients to Make Yogurt
The key ingredients to make yogurt are always the same – milk and some plain yogurt with live cultures (eg:L. Bulgaricus, S. Thermophilus, L. Acidophilus, Bifidus, L. Casei). Live cultures are good bacteria that is beneficial to the health of our gut and is essential to make a yogurt starter.
Any type of milk can be used to make yogurt – cow’s milk and goat’s milk are the most commonly used. I read that soy milk works too though I’ve yet to try it. I used both low fat milk and whole milk and I find that whole milk will produce a creamier yogurt. If you can’t tolerate dairy products, try coconut milk instead.
Different brands of commercial yogurt used for the yogurt culture will produce slightly different tasting yogurt. After using a few types of commercial yogurt brand as starters, you’ll be able to discern which one will produce the best tasting yogurt for you.
Equipment to Make Yogurt in a Thermal Cooker
Pot (to heat up milk)
Thermal Cooker (for incubation)
Cooking Thermometer (Not a must but handy if you have one)
Glass jars (Make sure they’re clean and dry)
Ladle
Whisk
How to Make Yogurt With a Thermal Cooker
Note: For food safety purposes, it is a good practice to sterilize all jars and equipment before making yogurt.
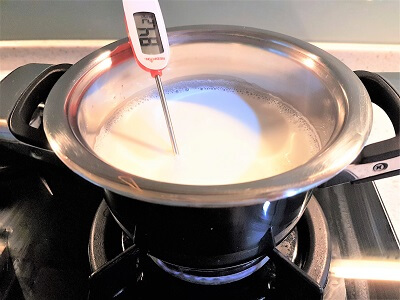
1. Heat up milk to 80°C – 85°C (176-185°F) in a pot over medium heat. This is to change the milk proteins and allow it to set and turn into yogurt. Stir the milk gently while it heats up so that the milk doesn’t get scorched at the bottom. Remove from heat once it reaches the required temperature.

2. Cool the milk to 45°C – 50°C (113-122°F). Stir occasionally to prevent a skin from forming. If a skin forms, you can either stir it back in or remove it.
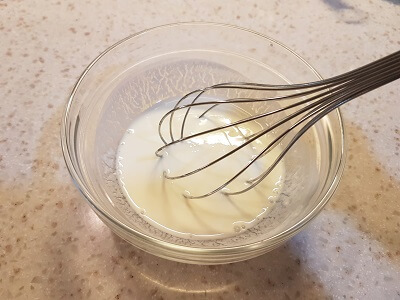
3. Mix yogurt starter with milk. Scoop out 4 tbsp of plain yogurt with live cultures into a bowl. Add 1 cup of the warmed milk and gently whisk until no lumps remain.

4. Add the starter to the milk. Pour the mixture back into the pot of warm milk and stir to combine.
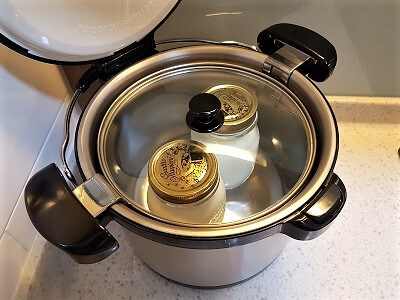
5. Pour into clean and sterilized glass jars and transfer to the inner pot. Cover the jars and inner pot with lids. Close the outer cover.
6. Incubate and wait. Leave the jars in the thermal cooker for 10-12 hours. I usually leave them in the cooker overnight. The longer it sits, the thicker and more tart the yogurt will become. Do not jostle or shake the pot so as not to disturb the fermentation process. Also, avoid opening the thermal cooker’s lid to prevent rapid loss of heat.
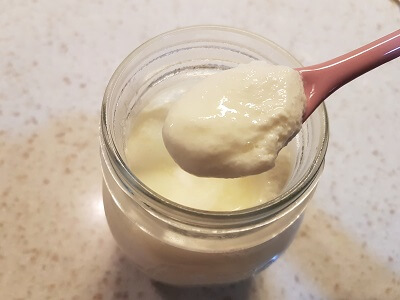
7. Check the yogurt. After 10 hours, the yogurt has set and thickened. You may notice some watery whey on top. Drain it off or stir it back into the yogurt. I like to stir it back in.
It is a good practice to label the bottles with the date it was made. Refrigerate and use the yogurt within a week. Remember to save a cup of the homemade yogurt for use as a starter yogurt for your next batch. Scoop it out into a small container after it has cooled and set and before it’s eaten to avoid contamination.
Why I Think a Thermal Cooker is the Best Yogurt Incubator
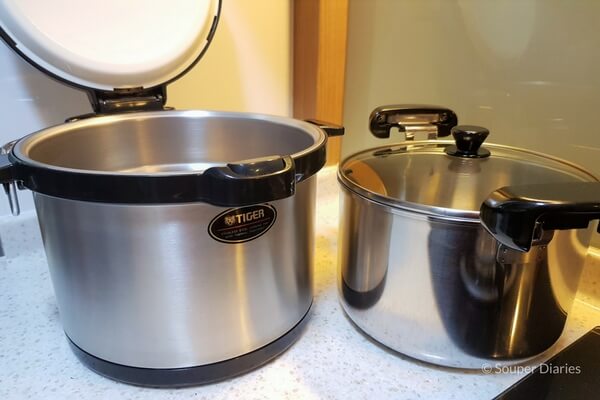
Tiger thermal cooker 5.2L
It is necessary to keep the milk and yogurt mixture in a warm place for the good bacteria to do its job. There are many ways to incubate yogurt. Some commonly used methods include using a yogurt maker, dehydrator, oven, crockpot, heating pad and towels, picnic cooler, etc.
Here’s why I love using my thermal cooker when making yogurt.
1. Savings in time and energy. It doesn’t use nor require any energy. Unlike using a crockpot or oven, I do not have to pre-heat the cooker at all.
2. No fuss, no muss. There’s no need to place any hot water bottles nor use any towels to wrap up the cooker. Just use it as it is.
3. Flexibility. You don’t have to fully fill the inner pot to successfully incubate the yogurt. I’ve made yogurt in the thermal cooker before with just half a pot of yogurt.
If using glass jars, you don’t need to have many jars of warmed milk in the cooker in order to have enough heat in the pot. In one of my experiments, I placed just one 500 ml jar of warmed milk and nothing else in the thermal cooker. I covered the lid and left it to incubate overnight. The next morning, the milk has turned into a creamy and delicious yogurt. Easy peasy.
4. Versatile cookware. When I bought my thermal cooker, it was mainly for making soups, stews and liquid based dishes. I was very pleased to discover that it can also be used to make yogurt, chicken stock, cake, rice, etc.
Why Yogurt Is Good For You
It’s true what most people say about homemade yogurt. It is simply the best. Once you’ve made your own, you may never want to return to commercially made yogurt. Homemade yogurt just tastes… different. Creamier. Tastier. Definitely better. The best part for me is the satisfaction of eating my own homemade yogurt. I’m also more inclined to eat yogurt if I made it myself. My kids love dressing up the yogurt with fruits, honey, granola and what-have-you. It’s simply delicious!
Not only that, yogurt is a really versatile food. There are many recipes with yogurt as an ingredient. Use it in dishes like curries, salad dressing, as a marinade, in baking and so many more.

Do you make your own yogurt? I would love to hear your questions and thoughts about this easy homemade yogurt recipe with a thermal cooker. If you’ve enjoyed this post, please share it on your social media! 🙂
Other thermal cooker recipes you may like:
Beetroot and Corn Soup
Chinese Chicken Stock
Chicken and Potato Stew
- 1 litre whole milk
- 4 tbsp plain yogurt with live cultures
- Tools:
- Thermal Cooker
- Cooking Thermometer
- Mason jars
- Heat the milk up to 80°C - 85°C (176-185°F) in a pot over medium heat. Stir occasionally so that the milk doesn't get scorched at the bottom. If a skin forms, you can either stir it back in or remove it.
- Once it has reached the required temperature, turn off the heat and let the milk cool to the range of 45°C - 50°C (113-122°F). The milk should be warm to the touch.
- Scoop out 3 tbsp of yogurt into a bowl. Add 1 cup of the warm milk and whisk until no lumps remain.
- Pour the mixture back into the pot of warm milk and stir gently making sure it is well combined.
- Pour into glass jars and place them in the inner pot. Cover the jars and inner pot with lids. Incubate for 8-10 hours in the thermal cooker. The longer it sits, the thicker and more tart the yogurt will become.

Hi Yvonne,
Do you wash your thermal pot before putting back the bottles with yogurt for incubation?
Thank you
Hi Deborah,
Yes, I make sure the inner pot of the thermal cooker is dry and clean before I put in the bottles of yogurt to incubate. 🙂
I love yogurt but don’t know how to make my own. Your handy tips and tricks to make yogurt with a thermal cooker is very helpful. Thanks!
Hey, Yvonne. I am currently bodybuilding now and I am wondering if soy milk can be used for Yogurt. I am trying to be more pro-vegan. Anyway, I also recommend Sheep milk because Sheep milk tend to have …. I am not quite sure what you it. It is a compound that make the milk thicker as compared to cow and goat milk. Sheep milk is the best milk to make ice cream and yoghurt.
Hi Arthur,
Yes, soy milk can be used to make yogurt. If you’re making yogurt for the first time, you’ll need to get a store-bought yogurt or a yogurt starter powder. I’ve not tried making yogurt with sheep milk. If you like thick yogurt, you can strain it. Cheesecloth is commonly used to strain but I dislike the cleaning up. I found out that using large paper filters will work too. You can purchase them online here.
You quickly got my attention with your excellent graphics and easy to follow recipe instructions , Yvonne !
Your recipe details and accompanying graphics make this mouth-watering yogurt a must try for me .
I see that I can make yogurt with my crock pot . Thanks for pointing this out . I will be making my own yogurt this evening . Never thought that it could be that easy!
Will return for your ” soup ” recipes later .
Paul
You can definitely do that but take note that it will take a longer time. To make slow cooker yogurt, pour the milk into a slow cooker and heat it up to between 180°F-185°F. It takes about 2 hours to get to the right temperature. Cool the milk to around 110°F in the crock pot. It will take another 2 to 3 hours. Then mix the yogurt starter into the cooled milk. To incubate, wrap the slow cooker with a large towel and leave it undisturbed overnight. You can also transfer the entire slow cooker into an oven (with light on) to incubate.
Like Jeremy, I never knew yogurt was so easy to make at home! I’ll probably try this recipe sometime, thank you for sharing it!
I just want to ask… any idea whether it will be possible to make flavored yogurt using strawberry or chocolate milk? Also, are there any particular brands of yogurt that you would recommend using? 🙂
Hi Nigel,
Thanks for writing in. I’ve not tried to make yogurt with flavored milk before but I think it should work too. Any yogurt brand is fine as long as it is plain, unflavored and contains live cultures. Some common yogurt cultures include S. Thermophilus and L. Bulgaricus.
If you’re making homemade yogurt with this recipe, do let me know how it turns out especially if you’re using flavored milk!
Hi
what a great post, I’m always looking for a way to keep the price down when it comes to healthy foods so thanks for the tip. Would you recommend your home made yogurt as a good protein source ?
What a genius idea! Why didn’t I think of this earlier? My Aunt is a big fan of yogurt making, I wonder if she knows about this simple idea.
I totally agree with you though, ever since I tried my Aunts homemade yogurt I hardly ever by it from the supermarket now, haha.
Thanks for this detailed post, and I’m going to share it with her right now.
Thanks Brandon,
I’m sorry I missed your comment! What does your aunt use to incubate the yogurt? For me, I find the thermal cooker a very convenient and useful tool in the yogurt incubation process. Easy and fuss free. 🙂
Great article, easy to follow and the images are great when you are following a recipe. Makes me want to go out and start making yoghurt today. Thanks for the inspiration.
I must say Yvonne, I really like your site’s style! It feels peaceful and relaxing and I like the asian designed logo. And your article was very good, I never thought about using a thermal cooker to make yogurt, but I love to eat healthy too and this could be a great option! I love yogurt, nuts, fruits and everything good for the body. Your use of pictures on each step is appreciated too. Overall great job, keep at it!
Really interesting – I had never heard of a thermal cooker before so had to go to your other post to see the description (i initially thought it was some kind of slow cooker). I like using yogurt in smoothies as it makes them more filling and was pretty interesting to see how to make your own and that it is cyclical in that you can use the left overs to power up your next batch. I wonder though if you can use Almond milk to make a form of yogurt as I rarely drink cows milk
Yes, you can use almond milk. In fact, other type of nuts like hazelnuts, Brazil nuts, pecans, macadamia and walnuts can be used too as a cow’s milk alternative. Hope that helps.
Wow, I never knew making yogurt was so easy! I also enjoy yogurt, especially when I have an upset stomach I feel the yogurt is soothing.
If you don’t have a thermal cooker can you use something like a rice cooker or a crock pot? Also just to clarify, does the thermal cooker need to be warm? Or is just to keep the milk/yogurt mixture at the ~110 F temperature mark for 8-10hours?
Thanks!
Hi Jeremy,
My late mom used to make yogurt regularly so I knew that it was not that hard. And using a thermal cooker as an incubator made it even easier. All I did was to heat up the milk, cool it down before adding the starter and finally, transfer it to the thermal cooker to incubate.
Yes, you can use a crock pot or rice cooker too if you don’t have a thermal cooker. If you’re going the rice cooker route, check out this blog. It is recommended to put the milk in a ceramic bowl before placing it into the rice cooker. This is because the rice cooker is made of metal and tends to produce inconsistent results.
A thermal cooker is cordless and does not use electricity. The only thing that needs to be warm is the inoculated milk. Once it cools to 45°C, transfer it to the cooker immediately and let it ferment undisturbed for 8 – 10 hours. Hope that helps.